ARCHIVED - CFMRI GE MR750 Imaging Protocol Documentation
ARCHIVED - CFMRI Multiband Protocol #1
Protocol Location and Receiver Coil Info
The ABCD protocol requires the use of the Nova Medical 32 channel head coil
The ABCD protocol can be found on both the 3T West and 3T East scanners under: * Adult >Template-> C_CFMRI_ABCD_Scan_Session1_v22
Pre-Scan Preparation
Place the 32channel coil on the scanner table and plug it in
Make sure the coil is recognized by the scanner by checking on the iROC monitor above the patient bed
Setup peripheral equipment such as the projector, screen, stimulus laptop, etc.
Setup the subject (blanket, emergency communication device, mirror, etc.) on the scanner patient bed
Setup physiological monitoring if needed
Register the subject and “Start Exam”
Data Acquisition: EPI & Topup Distortion Correction
CFMRI fwd ABCD (~17 sec)
Magnetic susceptibility and geometric distortion artifacts can be addressed by acquiring two short sequences with opposite phase encoding directions (1. Forward: Anterior–>Posterior, 2. Reverse: Posterior–>Anterior), followed by preprocessing using FSL topup https://fsl.fmrib.ox.ac.uk/fsl/fslwiki/topup
The ABCD topup scans should have 60 slices
The topup scans do not utilize multiband acceleration
The number of slices you see in the Rx reflects the total acquisition coverage
Center the slices over the desired location in the brain

- Save Rx–>Scan
There may be a long (20 sec) pause before the topup scan begins
CFMRI rvs ABCD (~17 sec)
To run the second (rvs) topup scan you will need to copy the Rx from the previous topup scan (fwd)
- Use the Graphic Rx Toolbar
Select the previous topup (fwd) scan Rx
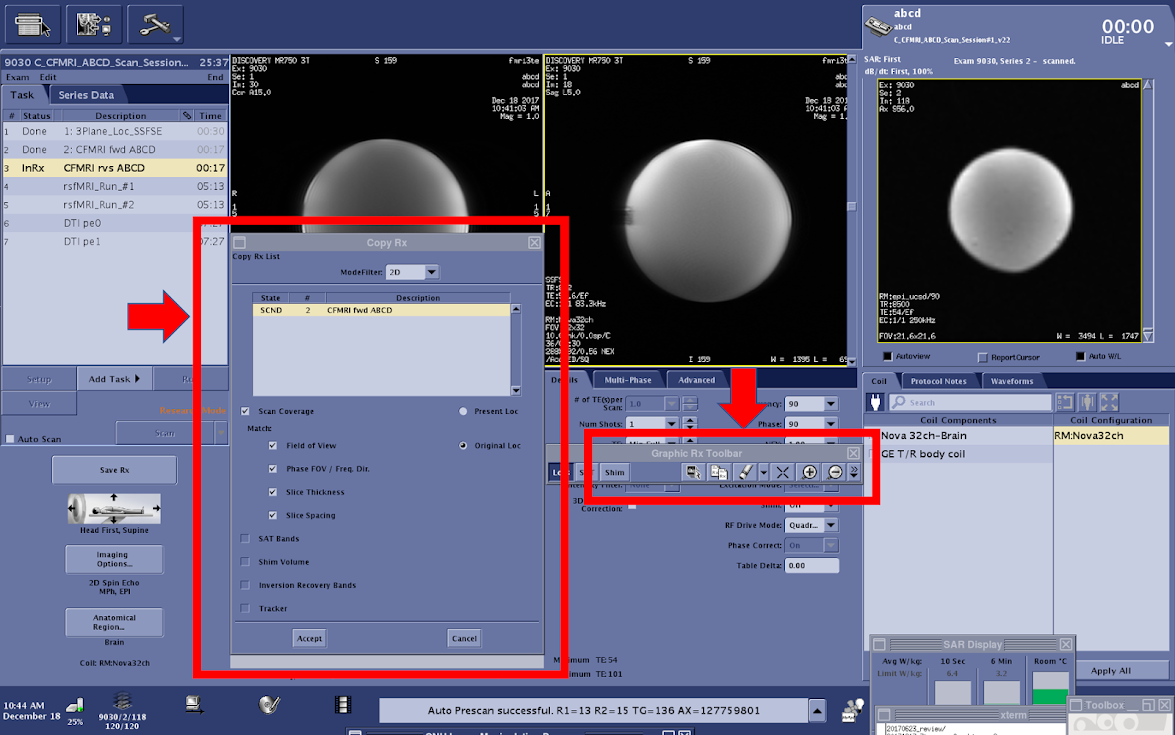
Save Rx–>Scan
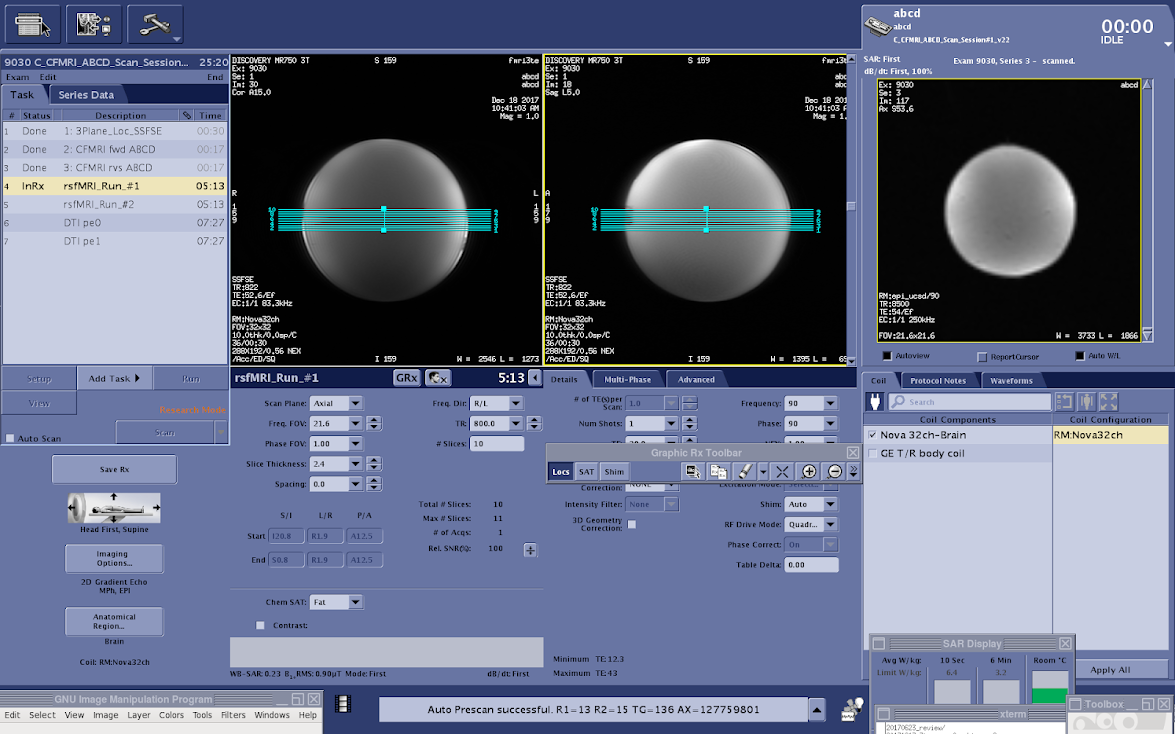
rsfMRI_Run_#(1-4) (~5.5 min each)
The multiband ABCD fMRI sequence acquires 60 total slices using a multiband factor of 6.
Using the current GE MR750 software available on CFMRI scanners, only 10 of the 60 slices are visible during the final Rx setup phase
Erase the default Rx (10 visible slices) and copy the full (60 slice) Rx from the CFMRI fwd ABCD series
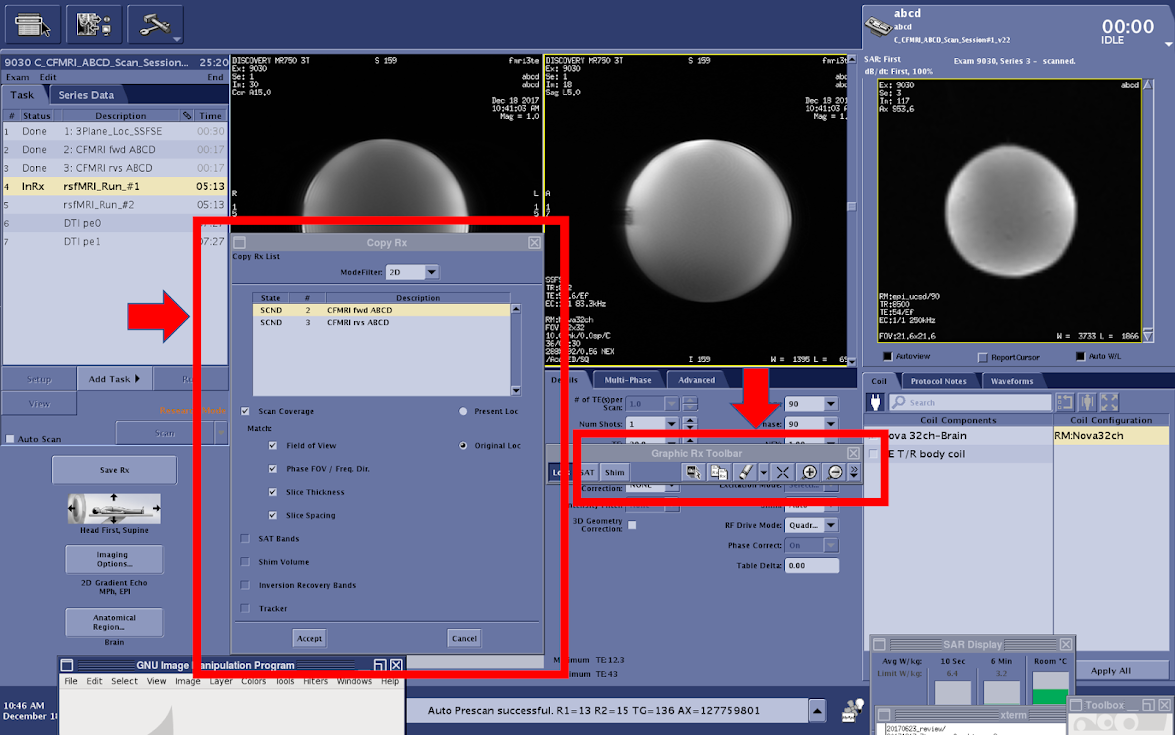
Copying this Rx will keep the location consistent across topup and fMRI scans, which is critical for the success of your imaging session
After the slice coverage is successfully copied from the topup scan, reduce the number of visible slices to the original parameter setting (10 slices)
- The duration of your fMRI scan can be adjusted using Phases per Location on the console (Multi-Phase tab)
The total scan time for your scan is calculated by TR x number of Phases per Location
- IMPORTANT: The first 2 x Multiband Factor ( 2 x 6 (ABCD MB factor) = 12) reps will not be included in your final dataset. These volumes are internal calibration images used as reference images for the reconstruction (https://cni.stanford.edu/wiki/MUX_EPI).
12 reps x 1000 ms (TR) = 9.6 seconds of data not included in the final dataset
The timing of your stimulus presentation must be designed with this in mind

- When you are ready to save the Rx, check the scan time to ensure it is an accurate reflection of the expected acquisition time (TR x Phases per location)
Save Rx–>Scan
Data Acquisition: Diffusion Tensor Imaging (DTI)
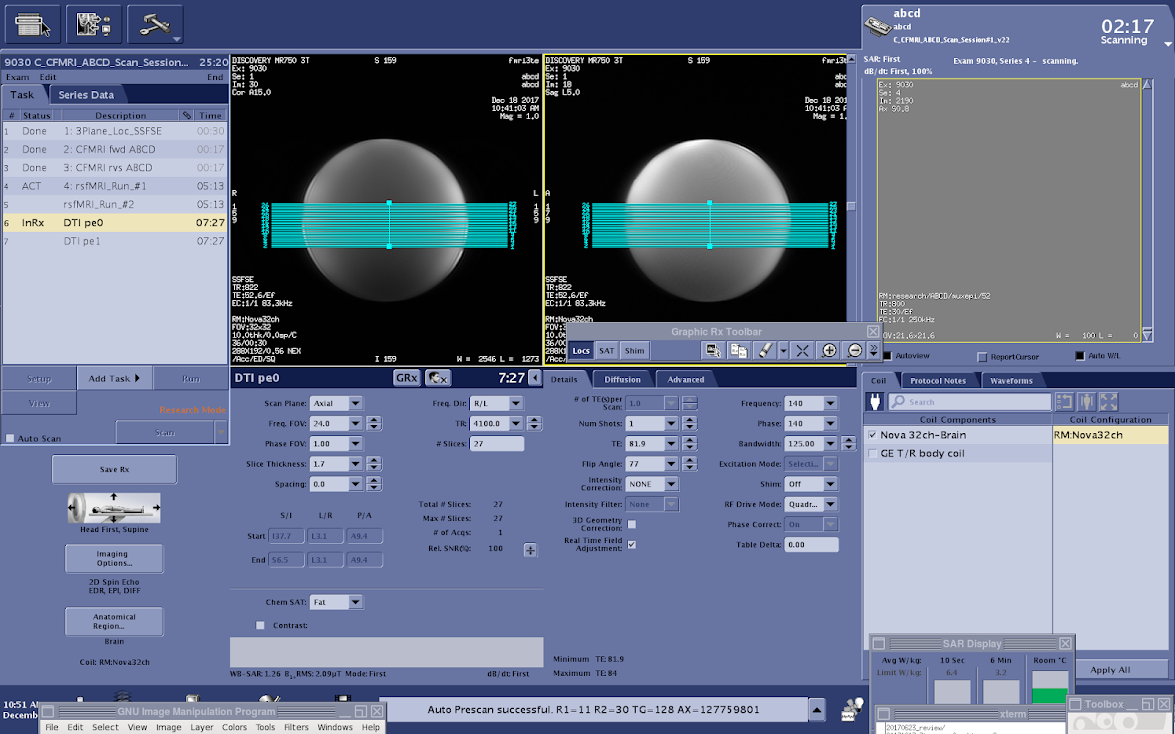
DTI pe0 (7:27)
The multiband ABCD DTI sequence acquires 81 total slices using a multiband factor of 3
Using the current GE MR750 software only 27 of the 81 slices are visible during the final Rx setup phase
It is easier to set the Rx and ensure proper anatomical coverage if you can see all of the slices that you will acquire
This will require temporarily setting the number of slices to 81
Before changing the number of slices to 81 (total number of slices collected) you must increase the TR dramatically to account for the length of time required to image a larger number of slices (ex: from 4,100 ms to 1,4100 ms)
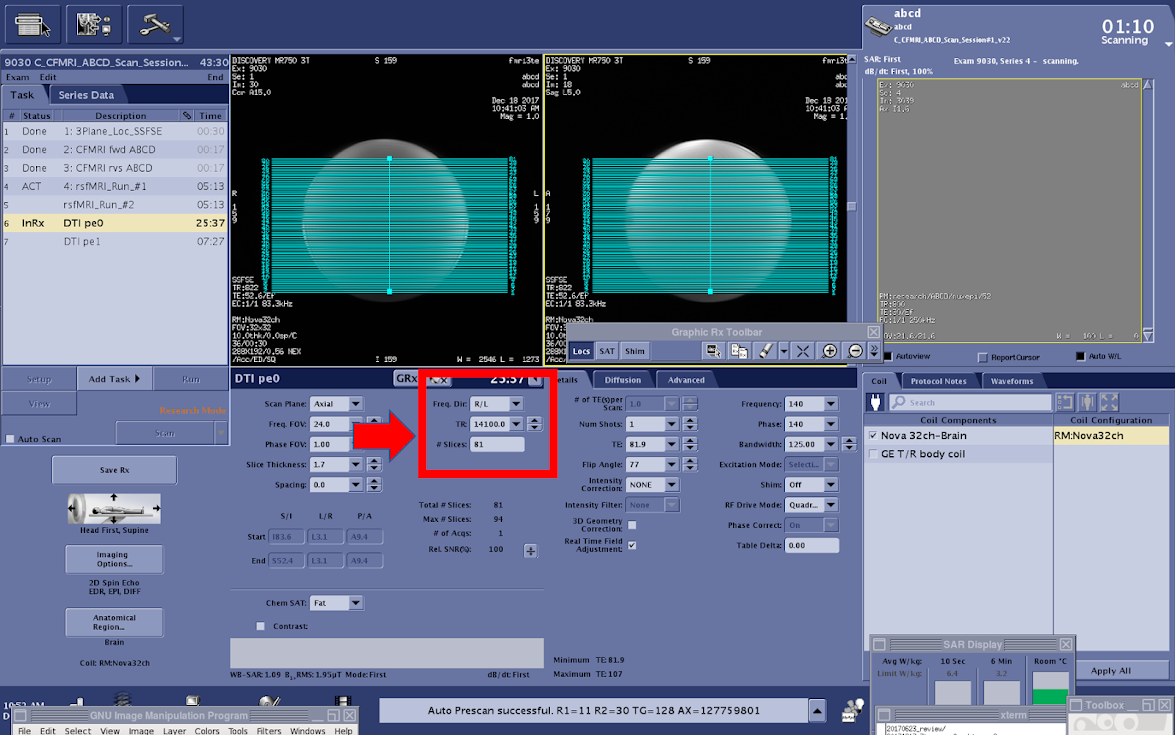
Increase TR (4,100 –> 14,100)
- Set the number of slices to 81 (total number of slices collected)
If you do not change the TR before editing the number of slices you will receive an advisory error indicating that you have exceeded the maximum number of slices that can be acquired within the current TR
Center the slices over the desired coverage area of the brain
Return # of slices to the original value (27)
- Change TR back to 4,100 ms
If you do not return the number of slices to 27 before editing the TR you will receive an advisory error indicating that you have exceeded the maximum number of slices that can be acquired within the current TR

If the scan time has returned to normal (7:27), you are ready to begin

DTI Distortion Correction Acquisition Option #1:
DTI pe1 (7:27)
To run the second (pe1) DTI scan you will need to copy the Rx from the previous DTI scan
Use the Graphic Rx Toolbar
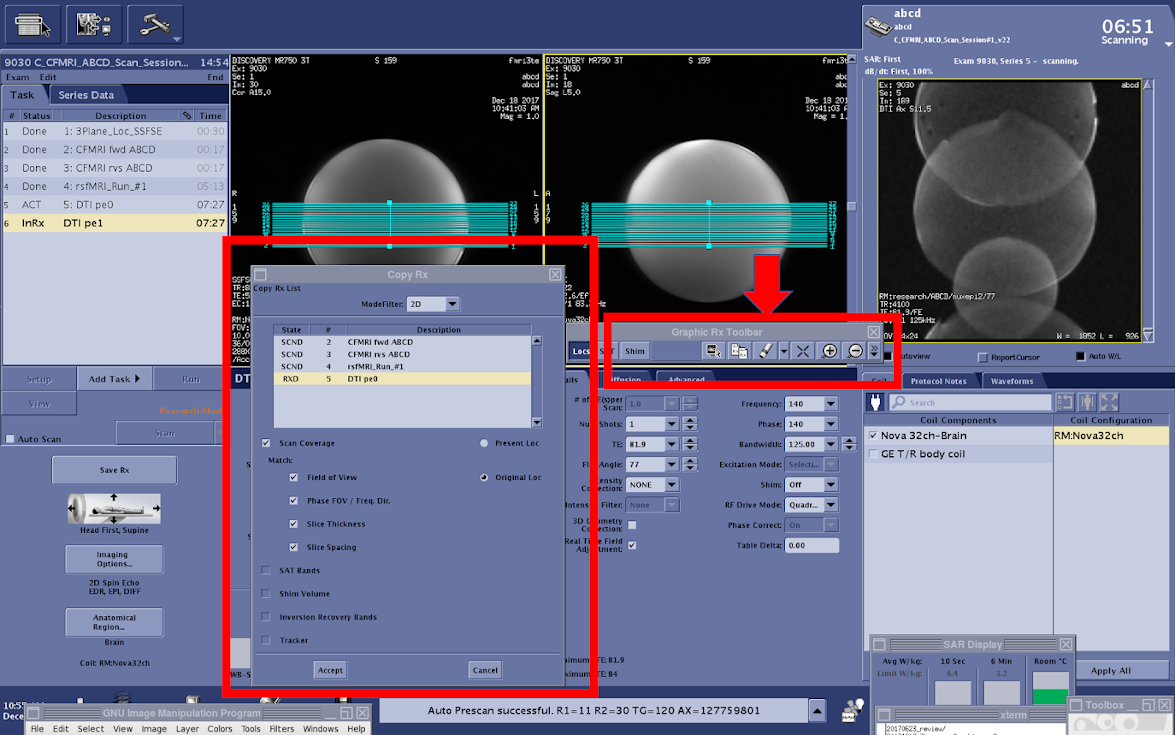
Select the previous DTI scan Rx
Save Rx–>Scan
DTI Distortion Correction Acquisition Option #2:
DTI_fieldmap (pe1) (~0:50)
The official ABCD protocol uses an Rx matched, 50 second, reverse phase encoded DTI acquisition to perform distortion correction on the full (7:27) forward (pe0) acquisition * Pros: Reduces total scan session time by ~6 min * Cons: All resulting diffusion analyses are based on one ~7 minute acquisition
The process of running the DTI_fieldmap is identical to the instructions above (DTI pe1)
ARCHIVED - CFMRI Multiband Protocol #2
Protocol Location and Receiver Coil Info
The CFMRI Multiband Protocol #2 (HCP Lifespan Based) requires the use of the Nova Medical 32 channel head coil
The MB Protocol #2 can be found on both the 3T West and 3T East scanners under: * Adult >Template-> C_CFMRI_HCP_LIFESPAN
Pre-Scan Preparation
Place the 32channel coil on the scanner table and plug it in
Make sure the coil is recognized by the scanner by checking on the iROC monitor above the patient bed
Setup peripheral equipment such as the projector, screen, stimulus laptop, etc.
Setup the subject (blanket, emergency communication device, mirror, etc.) on the scanner patient bed
Setup physiological monitoring if needed
Register the subject and “Start Exam”
Data Acquisition: EPI & Topup Distortion Correction
CFMRI fwd HCP-L (~17 sec)
Magnetic susceptibility and geometric distortion artifacts can be addressed by acquiring two short sequences with opposite phase encoding directions (1. Forward: Anterior–>Posterior, 2. Reverse: Posterior–>Anterior), followed by preprocessing using FSL topup https://fsl.fmrib.ox.ac.uk/fsl/fslwiki/topup
The HCP-L topup scans should have 72 slices
The topup scans do not utilize multiband acceleration
The number of slices you see in the Rx reflects the total acquisition coverage
Center the slices over the desired location in the brain
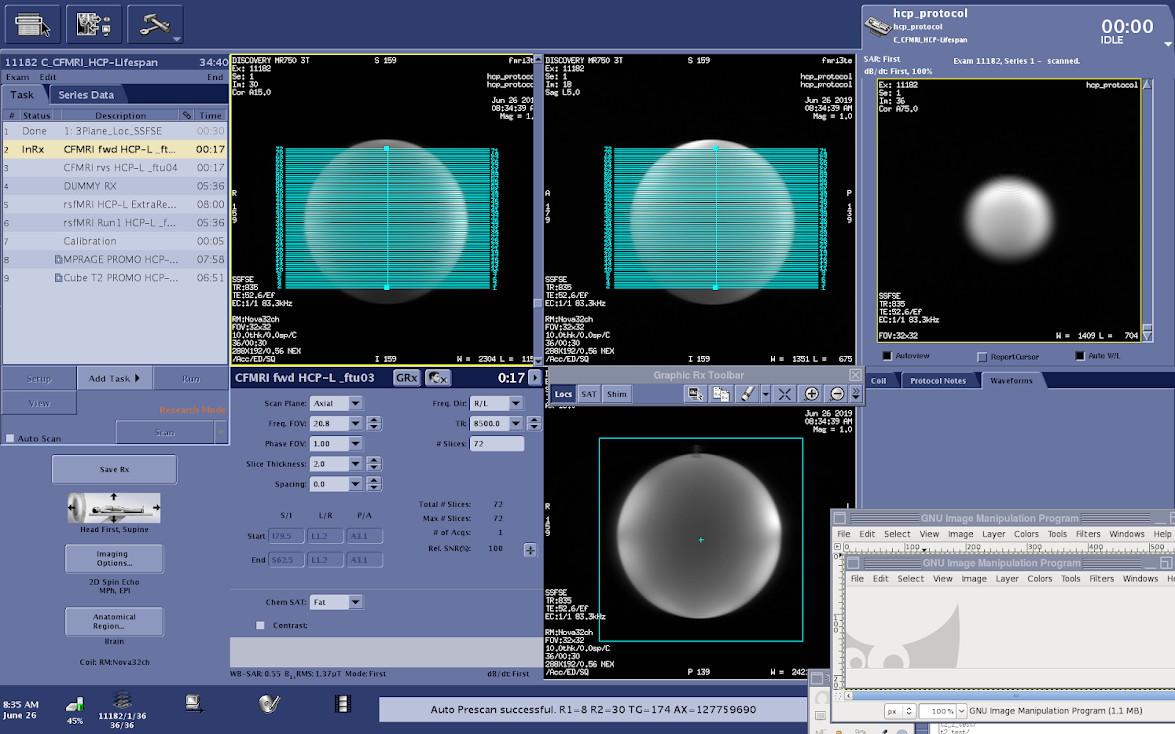
- Save Rx–>Scan
There may be a long (20 sec) pause before the topup scan begins
CFMRI rvs HCP-L (~17 sec)
To run the second (rvs) topup scan you will need to copy the Rx from the previous topup scan (fwd)
- Use the Graphic Rx Toolbar
Select the previous topup (fwd) scan Rx
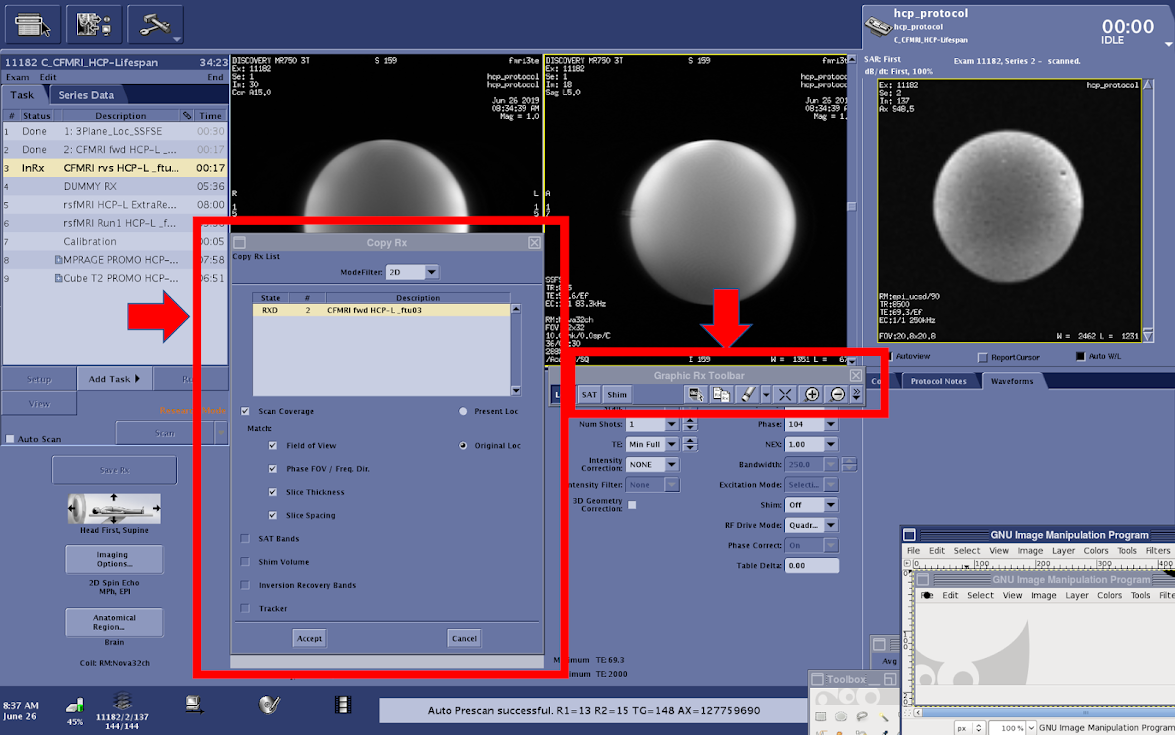
Save Rx–>Scan
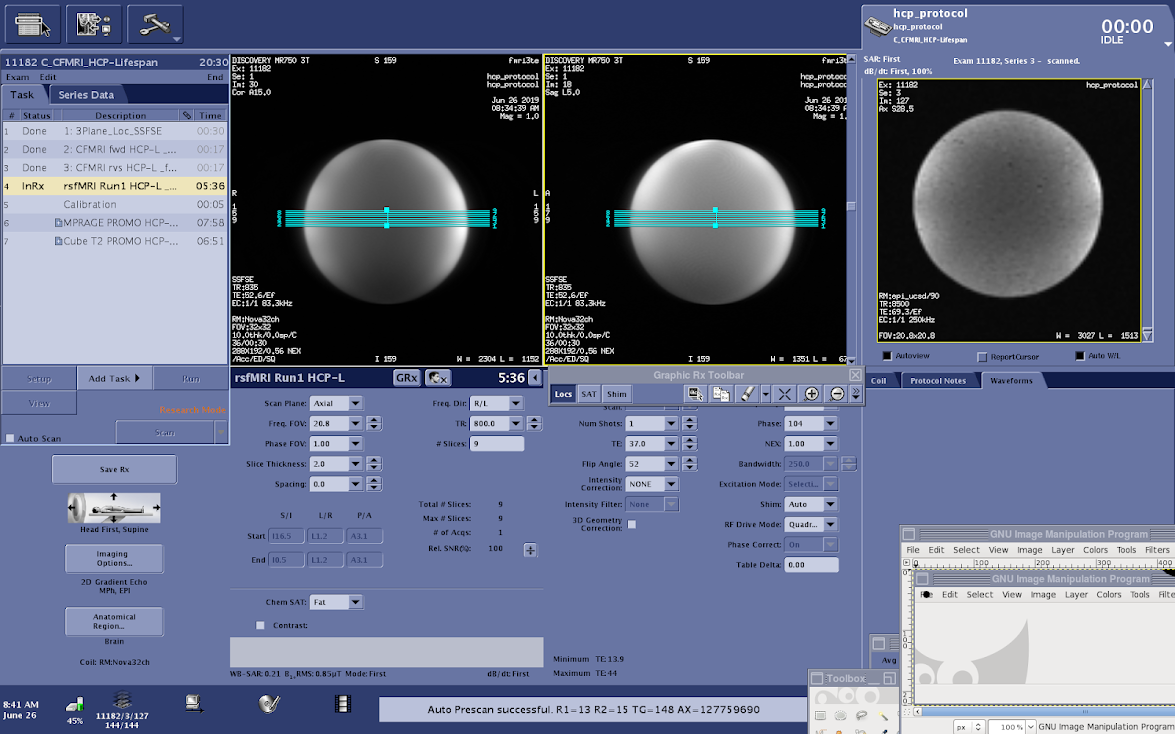
rsfMRI_Run_#(1-4) HCP-L (~5.5 min each)
The multiband HCP-L fMRI sequence acquires 72 total slices using a multiband factor of 8.
Using the current GE MR750 software available on CFMRI scanners, only 9 of the 72 slices are visible during the final Rx setup phase
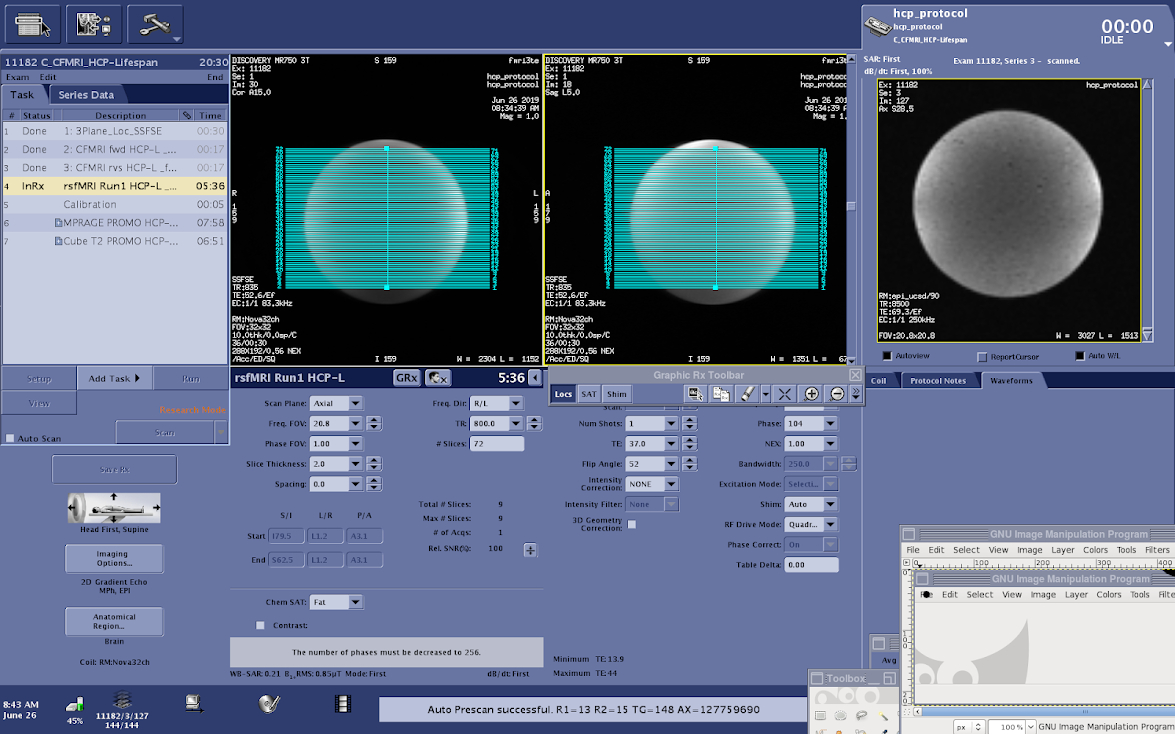
Erase the default Rx (9 visible slices) and copy the full (72 slice) Rx from the CFMRI fwd ABCD series
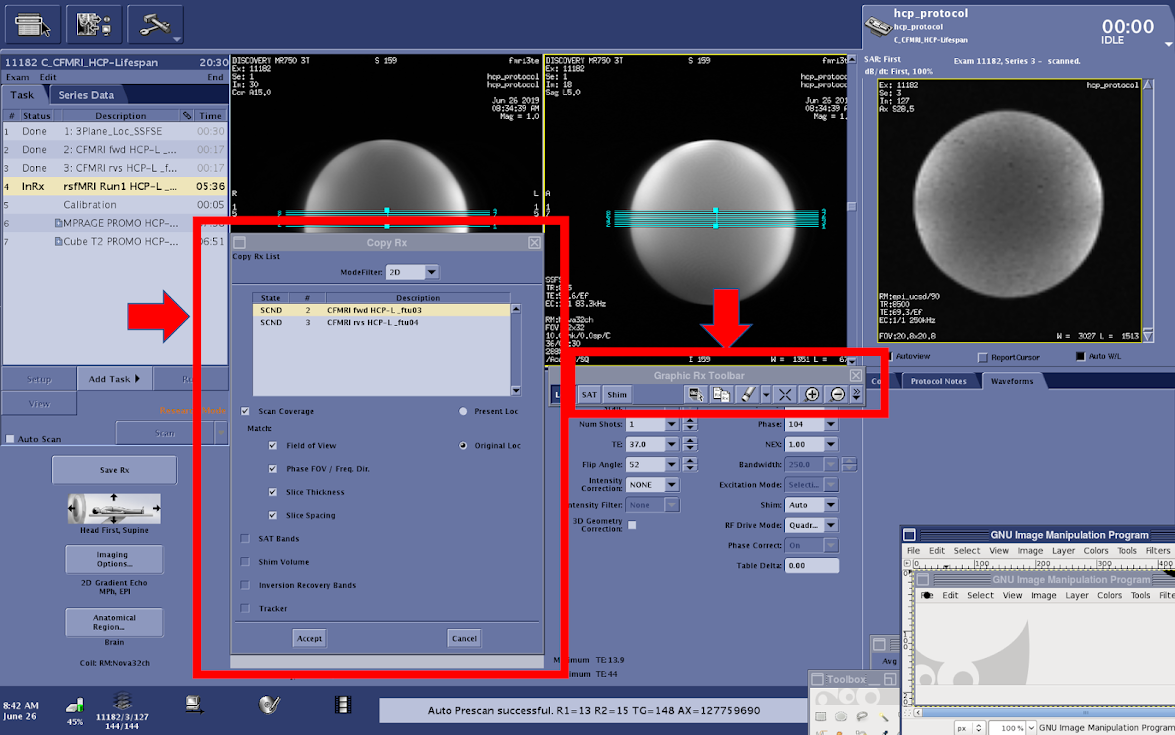
Copying this Rx will keep the location consistent across topup and fMRI scans, which is critical for the success of your imaging session
After the slice coverage is successfully copied from the topup scan, reduce the number of visible slices to the original parameter setting (10 slices)
- The duration of your fMRI scan can be adjusted using Phases per Location on the console (Multi-Phase tab)
The total scan time for your scan is calculated by TR x number of Phases per Location
IMPORTANT: The first 2 x Multiband Factor ( 2 x 6 (ABCD MB factor) = 12) reps will not be included in your final dataset * 12 reps x 1000 ms (TR) = 9.6 seconds of data not included in the final dataset * The timing of your stimulus presentation must be designed with this in mind
When you are ready to save the Rx, check the scan time to ensure it is an accurate reflection of the expected acquisition time (TR x Phases per location) * Save Rx–>Scan